Case Study I: RFID Triggers
Table of contents
- You will need:
- Step 1: Understanding the Hardware
- Step 2: Wiring
- Step 3: Particle Code
- Step 4: Setting up the Processing Sketch
In this case study, we’ll explore how RFID can be used to create a physical token that can be linked to digital content. This example will show you how to use a Particle Photon and an RFID reader to read in a tag, each tag will be related with a specific piece of digital content. The Particle will use serial communications to notify a Processing sketch when a tag is identified and Processing will display the media.
You will need:
Hardware
- RFID RC522
- Particle Photon Microcontroller
- Breadboard
- Jumper Wires
Software
Libraries
- MFRC522 RFID Library (https://github.com/pkourany/MFRC522_RFID_Library)
Step 1: Understanding the Hardware
Read the guide on working with RFID to learn more about the RF522
You can also explore:
- Library: https://github.com/pkourany/MFRC522_RFID_Library
- Datasheet: https://www.nxp.com/docs/en/data-sheet/MFRC522.pdf
Step 2: Wiring
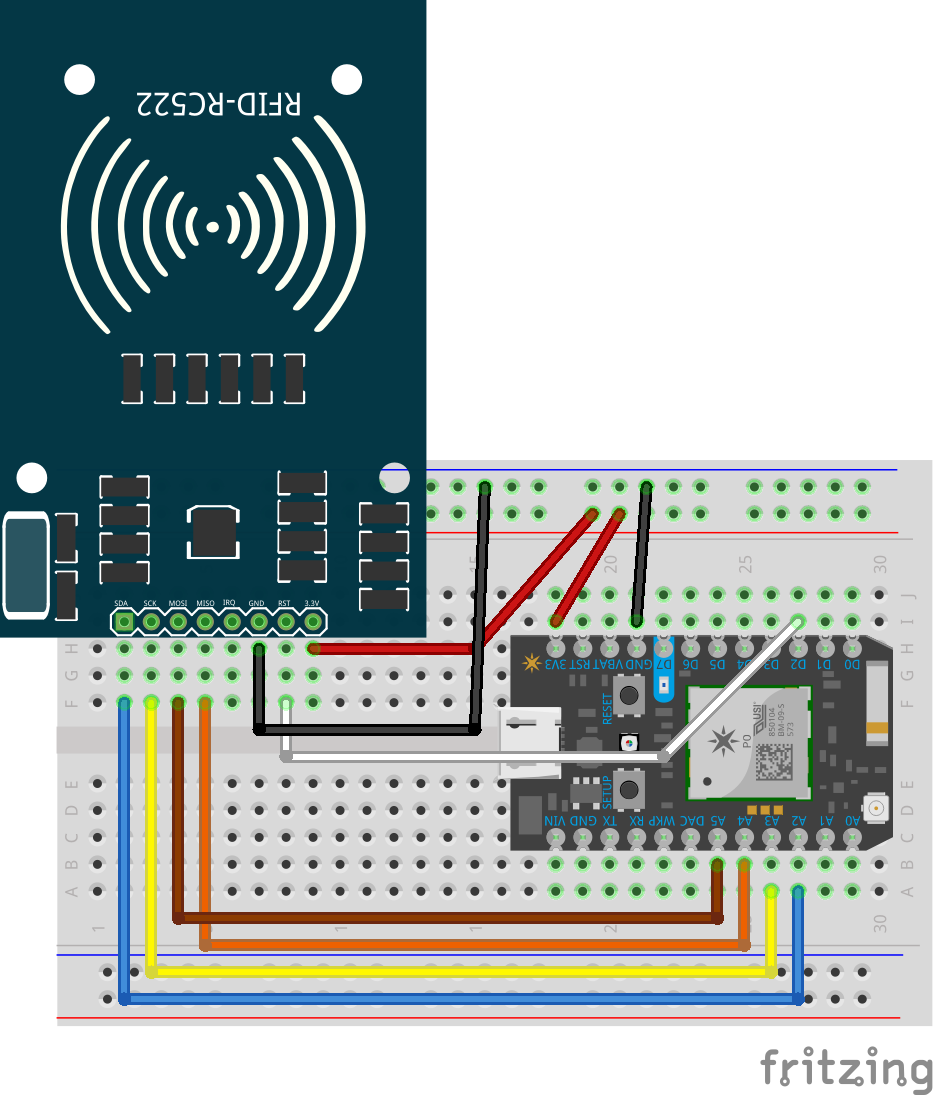
Wiring for RFID on Particle Photon
Wire up the SPI connection to communicate with the Photon as follows:
- MOSI to MOSI on Photon (A5)
- MISO to MISO on A4
- SCK to A3
- SDA to A2
- Wire up the RST (Reset Port) to D2
- Connect the power supply: 3.3V to 3.3V of the Photon and Ground to Ground.
Step 3: Particle Code
First start by including the library
#include "MFRC522.h"
Next set up your RFID reader as follows:
#define SS_PIN SS
#define RST_PI D2 // Reset Pin that we connected to D2

MFRC522 mfrc522(SS_PIN, RST_PIN);	// Create MFRC522 instance.
In the setup:
- Initialize serial communications with
Serial.begin; we’ll use this to share the RFID tag ID with Processing - Start the RFID scanner using
setSPIConfig()andPCD_Init()
It should look like this:
void setup() {
	Serial.begin(9600);	// Initialize serial communications (Baud Rate could set higher if
      // you need faster communication)
	mfrc522.setSPIConfig(); // sets up SPI config

	mfrc522.PCD_Init();	// Initialize RC522 card
	Serial.println("Start Scanning");
}
As part of the loop() you’ll want to
- Check if a card is on the reader
- Get the data from the card
- Look up the ID from the tag
- Share that tag ID as a Particle event
- Share that tag ID over Serial for Processing to read.
It’ll look like this
void loop() {
	// Look for new cards
	if ( ! mfrc522.PICC_IsNewCardPresent()) {
		return;
	}
	// Read tapped card data
	if ( ! mfrc522.PICC_ReadCardSerial()) {
		return;
	}

	String id = "";
	for (byte i = 0; i < mfrc522.uid.size; i++) {
		// Create a RFID Hexdecimal String by adding and converting the binary
		id += String(mfrc522.uid.uidByte[i], HEX);
	}

	// Convert to Uppercase
	id.toUpperCase();
	// Print the RFID identifier to the Serial Port
	Serial.print(id);

	// If it is this card,
	if (id == "AC7424D9") {
           //Send a Event to Particle Cloud Console
		Particle.publish("RFID", id, PRIVATE);
	}

	// Reset Id
	id = "";
	Serial.println();
	// Stop the reading after one tap
	mfrc522.PICC_HaltA();
	/* Used to exit the PCD from its authenticated state. Remember to call this function after
communicating with an authenticated PICC - otherwise no new communications can
start .*/
	mfrc522.PCD_StopCrypto1();
}
Now that the Particle is reading the tag and sharing the Info; let’s write some code in Processing to display some content.
Step 4: Setting up the Processing Sketch
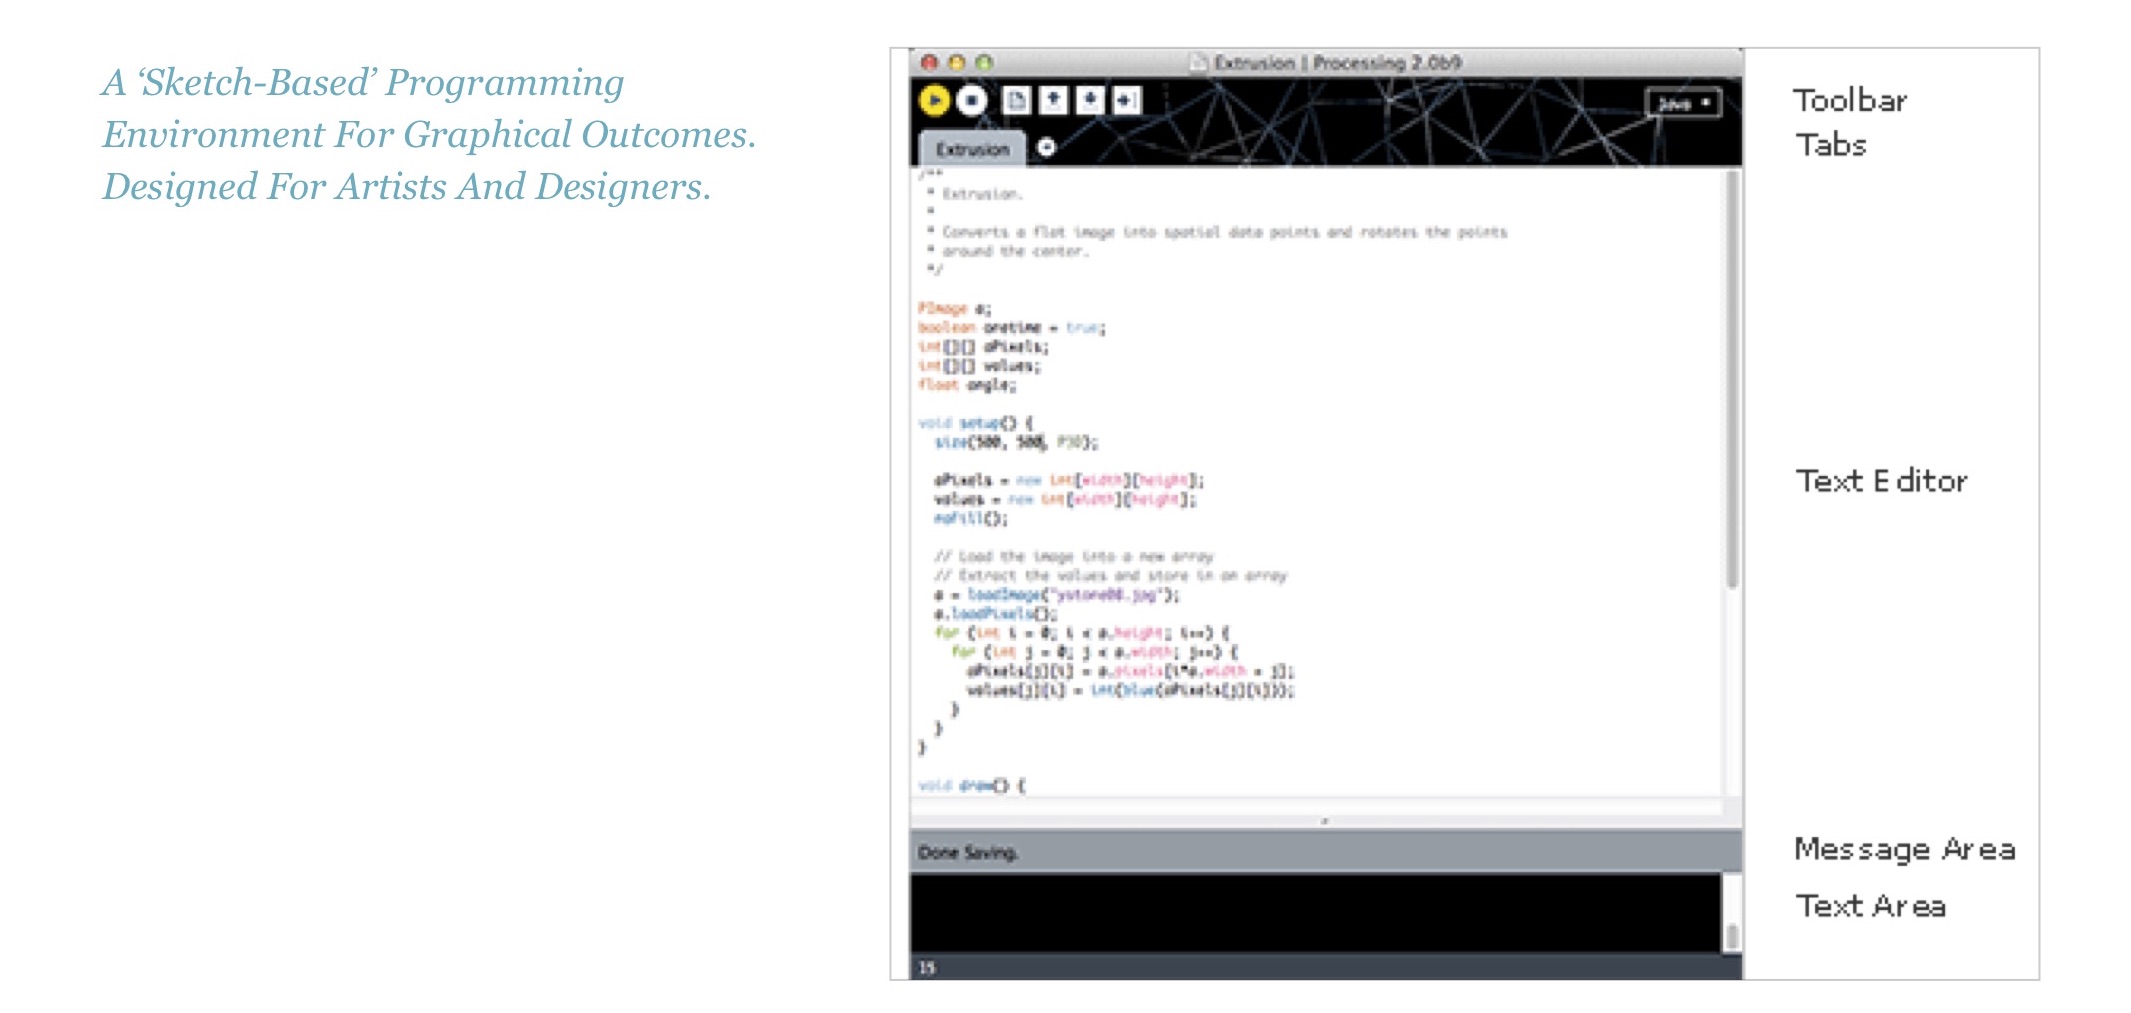
About Processing
Processing can be downloaded from
To start, first import the serial library! To do this, add the following line to the top of your sketch in Processing.
// Serial Port Communication library
import processing.serial.*;
And create an instance of the serial port
Serial port;
In addition, we’ll need to set up some variables to load the images we want to display on screen:
String id = "";
String buff = "";
// Setup a new instance of image
PImage img;
In the setup
- Create a surface,
- List the available serial ports
- And choose the one that matches the USB connection for your particle. You’ll probably need to modify the number in
Serial.list()[2]to match your computer’s configuration.
void setup() {
  background(0,0,0);
  size(640, 360);
  // Set the Processing Sketch always on Top
  surface.setAlwaysOnTop(true);
  // List of Serial Port / COM Port
  printArray(Serial.list());
  // Choose the correct Serial Port / COM Port
  // Baud Rate must match the Arduino Sketch
  // format: new Serial(this, Serial Port / COM Port, Baud Rate);
  port = new Serial(this, Serial.list()[2], 9600);
}
The draw is normally where you’d create on screen content and graphics. However, in this case, we only want to draw content when we receive an ID for a tag and when the tag matches one of the known RFID tags mapped to digital content.
void draw(){
  // Check if the port send anything
  while (port.available() > 0) {
    // Read the port
    serialEvent(port.read());
  }

}
Which brings us to responding to new data received through serial comms. We’ll handle that through a serialEvent method:
void serialEvent(int serial) {
  // Get all the information in buffer string until new line
  if(serial != '\n') {
    buff += char(serial);
  }
  /* Trim the buff to get the ID Hexadecimal
     This depends on how you send the data */
  else {
   id = trim(buff.substring(0));

   // Load Picture with RFID
   if (id.equals("B69B96BB")) {
     img = loadImage("moonwalk.jpg");
     image(img, 0, 0);

   // Access a link with RFID
   } else if (id.equals("AC7424D9")){
     background(0,0,0);
link("http://ideate.xsead.cmu.edu/gallery/courses/responsive-mobile-environments-6272cb24-8139-4d4e-bf10-7b7bc5390f7d/projects");

   // If anything other RFID tag reset
   } else {
     background(0,0,0);
   }
   // Reset Buffer String
   buff = "";
  }
}
In the above you’ll see that the if statements match the Tag ID sent by the Particle RFID reader over serial, to an ID. For example tag B69B96BB will display an image, while AC7424D9 will open a web page using the link( url ) method.
Modify as needed!