Case Study II: Sound reminiscence
](../assets/sound/resonant-ui.jpg)
Table of contents
- You will need:
- Step 1: Understanding the Hardware
- Step 2: Configure the SD card
- Step 3: Circuit Connection
- Step 4: Controlling the DF Player through Code
- Step 5. Complete Version
- Adapting this:
- References:
In this case study, we’ll explore using a MP3 player and some simple interactions to cue memory through sound. The example above - Tangible Memories’ Rocking Chair is a great illustration of where sound is a powerful cue to remembering and reminscence. For this prototype, they added a motion sensor to the chair so that rocking would activate the playback. The speakers (positioned to left and right of your head as you sit in the chair) then playback music, poems or ambient noises of nature selected as evocative triggers to the past.
We’ll explore building something similar with the Particle Platform.
You will need:
Hardware
- Particle Photon Microcontroller
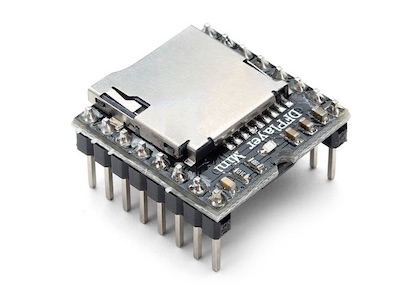
- DFPlayer Mini
- Breadboard
- Jumper Wires
- MicroSD Card to store mp3 (formatted to FAT)
- 1k Ohm Resistor (Depends on where you setup)
Software
- Particle Dev or Particle Build
Libraries
- None but specially modified file to communicate with DFPlayer Mini (if using Particle Photon)
- If using Arduino: DFPlayer-Mini Library (https://github.com/DFRobot/DFPlayer-Mini-mp3)
The DFPlayer-Mini
Step 1: Understanding the Hardware
Photocell
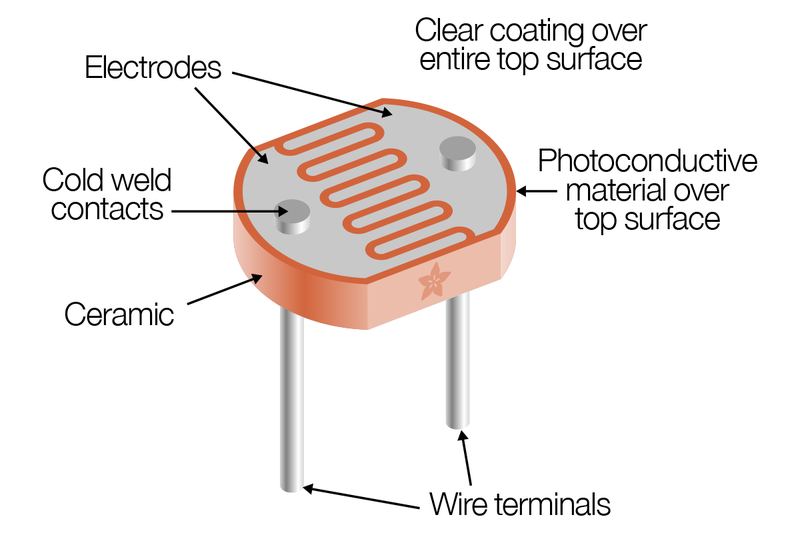
A photoresistor is a light sensitive resistive sensor. The photoconductive material on the top become less resistance when photon(Light) hits the top allowing more current to flow. This allow us to detect changes in the intensity of the light. (It does not detect color).
Learn more at https://learn.adafruit.com/photocells?view=all
DFPlayer Mini
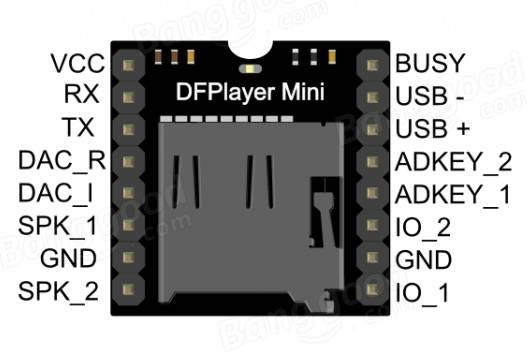
DFPlayer Mini is a module that allows user to read SD card to play mp3 files. Since the Photon microcontroller does not have large storage/memory, it cannot play mp3 file, this module make it easier for us to play sound files with the microcontroller.
Learn more at https://www.dfrobot.com/wiki/index.php/DFPlayer_Mini_SKU:DFR0299
Step 2: Configure the SD card
-
Store all audio files in preferably an MP3 format
-
Place all audio files in a folder name in “mp3” in the card’s root directory
-
Name all the files “001.mp3”,”002.mp3”…
For Mac users: OSX adds additional hidden directories to the card, like .trash. To solve this go to terminal and run the following command: dot_clean/Volumes/[Name of SD Card]
Step 3: Circuit Connection
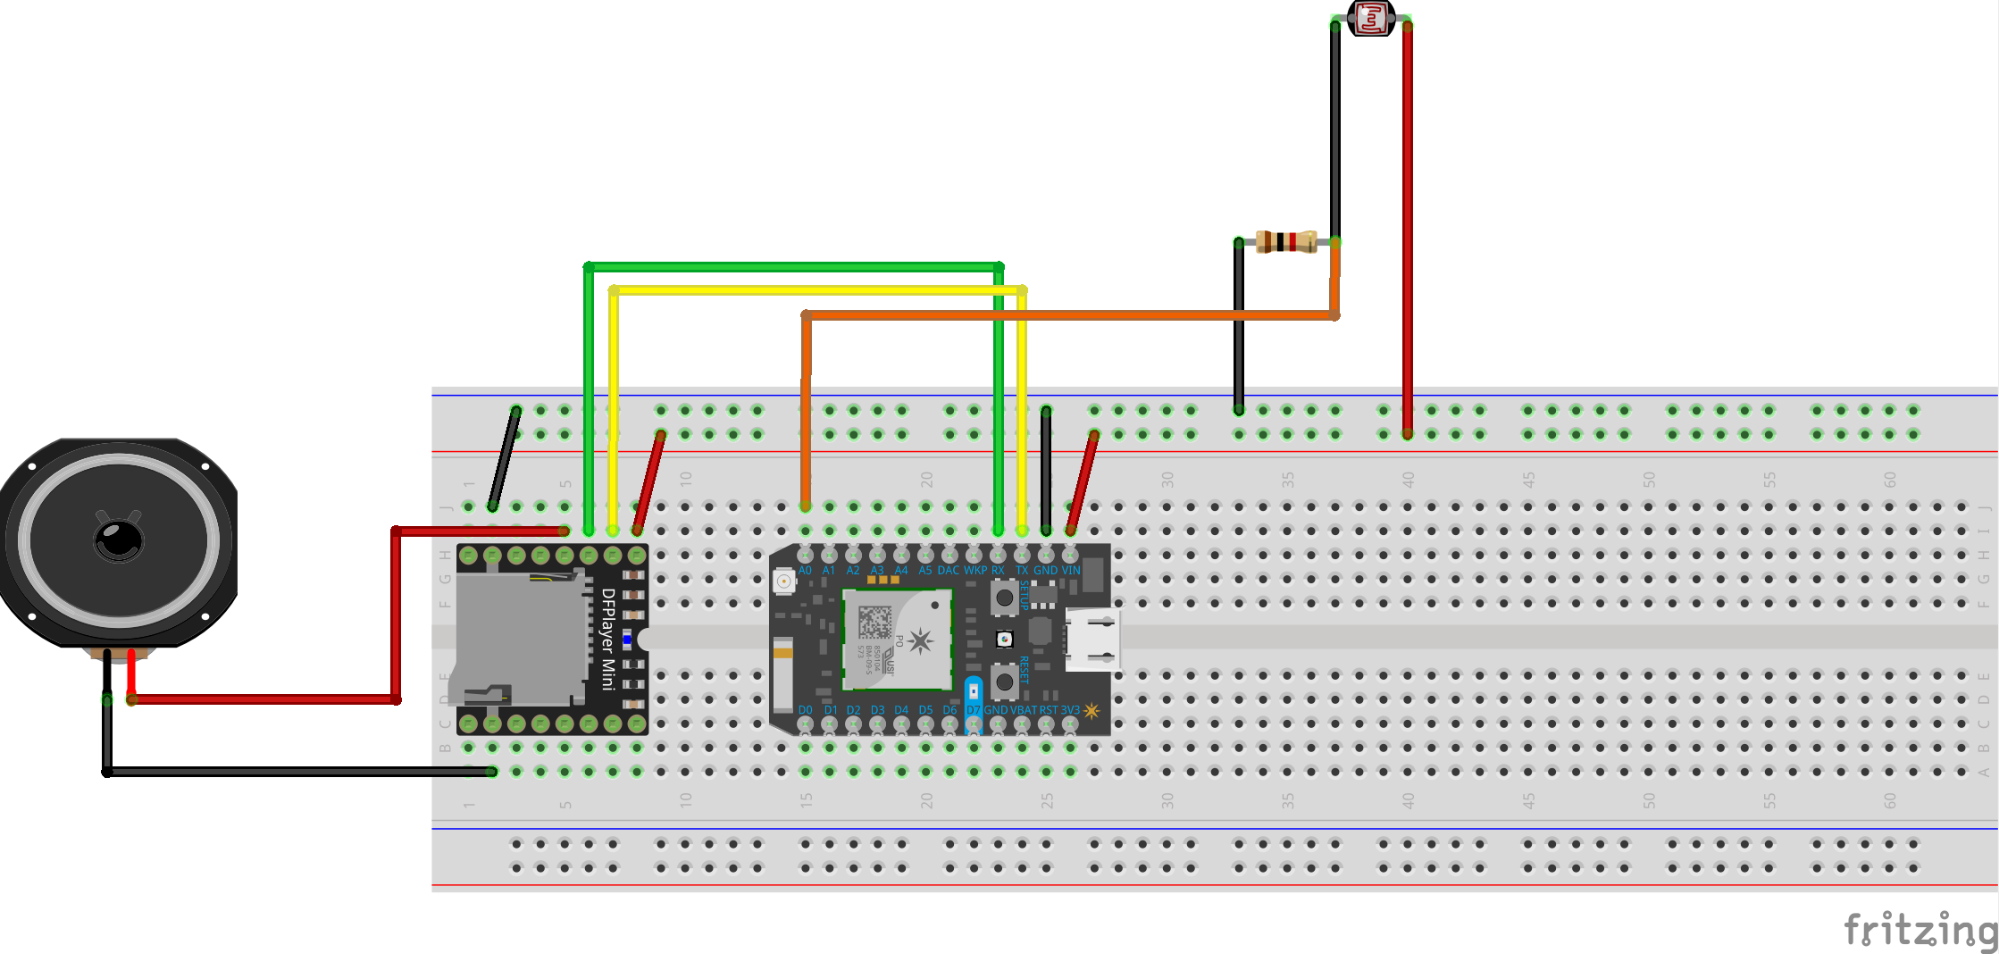
DFPlayer Mini Connection
- Connect
VCCto theVIN(Unregulated Voltage) of the Photon, which will allow DFPlayer Mini to receive higher voltage than 3.3V. - Connect
GroundtoGroundon Photon - Connect
TXtoRXon Photon (Green) - Connect
RXtoTXon Photon (Yellow)
Speaker
- Connect one side (Can connect any side) of the speaker to the
DAC_R(Digital to Analog Converter Right) on DFPlayer Mini - Connect the other side to the
Groundof the DFPlayer Mini
Photocell
- Connect one side (Can connect any side) of the Photocell to the
VINor3.3V. (VINprovides higher voltage to the photocell) - Create a voltage divider with an 1k Ohm resistor
- Connect the remaining side of the Photocell to the 1k Ohm resistor on side of the resistor
- Connect the same side of the resistor to
A0(Analog 0) - Connect the other side of the resistor to the ground.
Step 4: Controlling the DF Player through Code
Using the Particle IDE, we can set up a communication line between the DF Player and the Photon using Serial1. Communication is done using byte code viz. a short hex code string is passed through the serial to the DFPLayer which then reads it.
The byte code passed to the DF Player combines the following: a start byte, end byte, version byte, acknowledge byte, command length, command byte, and 2 parameter bytes. Barring the last 2 mentioned byte, all others (viz. start,end,version,acknowledge and command) remain the same through the code.
This works as follows:
FirstAdd a function that will communicate with the serial.
void execute_CMD(command, parameter1, parameter2){}
Calculate the sum of the individual bytes
int16_t checksum = -(Version_Byte + Command_Length + CMD + Acknowledge + Par1 + Par2)
Build the command line code which will be sent to the DF Player
byte Command_line[10] = { Start_Byte, Version_Byte, Command_Length, CMD, Acknowledge, Par1, Par2, checksum >> 8, checksum & 0xFF, End_Byte}
Send the byte code to the DF Player
for (byte k=0; k<10; k++)
 {
   Serial1.write( Command_line[k]);
 }
You’ll find these operations already worked out for you in the code below
Step 5. Complete Version
To put it all together, download the code, form and sounds used in this project.
-
Code: SoundShell
-
Form: Conch Shell by Caramujo
-
Sound/Music Used: http://soundbible.com/272-Shorebirds-Talking-On-Beach.html
Adapting this:
You can easily adapt this example to a range of contexts and uses:
- Use an accelerometer to detect motion and trigger playback and tie it to furniture like Tangible Memories - Rocking Chair Prototype Resonant UI
- Combine with GPS to create an interface for tune into oral and sonic histories of space and place: Listening to the Walls Whisper
- Combine with a compelling form to tune into personal sonic memories, like Petrelli et al’s FM Radio
References:
- https://community.particle.io/t/a-great-very-cheap-mp3-sound-module-without-need-for-a-library/20111
- DF Player Mini Manual
- DFPlayer Library - A Mini MP3 Player For Arduino - has several examples too
General Resources:
- BaudRate: https://learn.sparkfun.com/tutorials/serial-communication/rules-of-serial
- Particle Photon Guide: https://docs.particle.io/guide/getting-started/intro/photon/
- Particle Photon Datasheet: https://docs.particle.io/datasheets/photon-(wifi)/photon-datasheet/
- SPI Communication: https://learn.sparkfun.com/tutorials/serial-peripheral-interface-spi
- I2C Communication: https://learn.sparkfun.com/tutorials/i2c
DF Mini Commands
CMD CMD
HEX Dec Function Description Parameters(2 x 8 bit)
==== === =================================== ========================================================================
0x01 1 Next * [DH]=X, [DL]=X Next file in current folder.Loops when last file played
0x02 2 Previous * [DH]=X, [DL]=X Previous file in current folder.Loops when last file played
0x03 3 Specify track(NUM) * [DH]=highByte(NUM), [DL]=lowByte(NUM)
1~2999 Playing order is order in which the numbers are stored.
Filename and foldername are arbitrary, but when named starting with
an increasing number and in one folder, files are played in
that order and with correct track number.
e.g. 0001-Joe Jackson.mp3...0348-Lets dance.mp3)
0x04 4 Increase volume * [DH]=X, [DL]=X Increase volume by 1
0x05 5 Decrease volume * [DH]=X, [DL]=X Decrease volume by 1
0x06 6 Specify volume * [DH]=X, [DL]= Volume (0-0x30) Default=0x30
0x07 7 Specify Equalizer * [DH]=X, [DL]= EQ(0/1/2/3/4/5) [Normal/Pop/Rock/Jazz/Classic/Base]
0x08 8 Specify repeat(NUM) * [DH]=highByte(NUM), [DL]=lowByte(NUM).Repeat the specified track number
0x09 9 Specify playback source (Datasheet) ? [DH]=X, [DL]= (0/1/2/3/4)Unknown. Seems to be overrided by automatic detection
(Datasheet: U/TF/AUX/SLEEP/FLASH)
0x0A 10 Enter into standby – low power loss * [DH]=X, [DL]=X Works, but no command found yet to end standby
(insert TF-card again will end standby mode)
0x0B 11 Normal working (Datasheet) ? Unknown. No error code, but no function found
0x0C 12 Reset module * [DH]=X, [DL]=X Resets all (Track = 0x01, Volume = 0x30)
Will return 0x3F initialization parameter (0x02 for TF-card)
"Clap" sound after excecuting command (no solution found)
0x0D 13 Play * [DH]=X, [DL]=X Play current selected track
0x0E 14 Pause * [DH]=X, [DL]=X Pause track
0x0F 15 Specify folder and file to playback * [DH]=Folder, [DL]=File
Important: Folders must be named 01~99, files must be named 001~255
0x10 16 Volume adjust set (Datasheet) ? Unknown. No error code. Does not change the volume gain.
0x11 17 Loop play * [DH]=X, [DL]=(0x01:play, 0x00:stop play)
Loop play all the tracks. Start at track 1.
0x12 18 Play mp3 file [NUM] in mp3 folder * [DH]=highByte(NUM), [DL]=lowByte(NUM)
Play mp3 file in folder named mp3 in your TF-card. File format exact
4-digit number (0001~2999) e.g. 0235.mp3
0x13 19 Unknown ? Unknown: Returns error code 0x07
0x14 20 Unknown ? Unknown: Returns error code 0x06
0x15 21 Unknown ? Unknown: Returns no error code, but no function found
0x16 22 Stop * [DH]=X, [DL]=X, Stop playing current track
0x17 23 Loop Folder 01 * [DH]=x, [DL]=1~255, Loops all tracks in folder named "01"
0x18 24 Random play * [DH]=X, [DL]=X Random all tracks, always starts at track 1
0x19 25 Single loop * [DH]=0, [DL]=0 Loops the track that is playing
0x1A 26 Pause * [DH]=X, [DL]=(0x01:pause, 0x00:stop pause)
Commands with returned parameters (*=Confirmed command ?=Unknown, not clear or not validated)